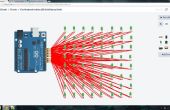
Paso 2: Cargar el código!
memset(packetBuffer, 0, packetSize); // erase the contents of packetBuffer packetBuffer[0] = 0x2; // Rip command type of response packetBuffer[1]= 0x1; //Define which version of RIP to use: RIP v1 packetBuffer[2] = 0x0;// bytes of padding packetBuffer[3]= 0x0; packetBuffer[4]= 0x0; packetBuffer[5] = 0x02; packetBuffer[8]= 0xC0; // first octet of network ID to spoof 0xC0 = 192 in decimal, this could be any network you want to advertise packetBuffer[23]=0x00; // metric for the route, the lower the metric the more favourable it is Udp.write(packetBuffer,packetSize); Udp.endPacket();// note the packet isn’t actually sent until you call endPacket().

![Mostrar datos en un sitio web - olla electrónica [Arduino Nano + Ethernet Shield] Mostrar datos en un sitio web - olla electrónica [Arduino Nano + Ethernet Shield]](https://foto.askix.com/thumb/170x110/6/5d/65d8cdd6f7835b48d99fa83b376b85ec.jpg)
![[Tutorial para 4DIY.ORG] - Cómo controlar LED con iphone usando [4DIY.ORG] App y Ethernet Shield [Tutorial para 4DIY.ORG] - Cómo controlar LED con iphone usando [4DIY.ORG] App y Ethernet Shield](https://foto.askix.com/thumb/170x110/8/65/8655f571aa8757ee2797df655b454b17.jpg)
