Paso 4: Código subir
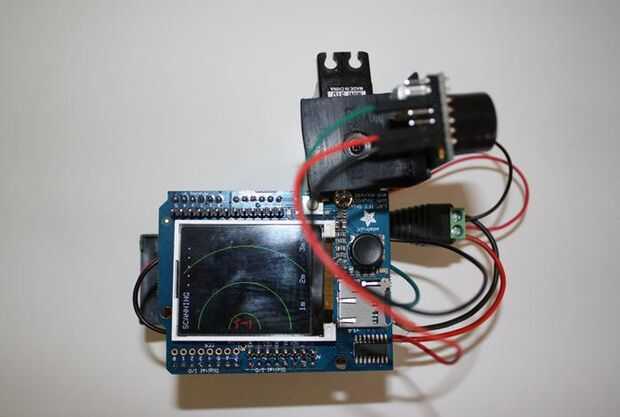
- Conecte el Uno a un PC vía USB. Copie el código que se muestra a continuación en un boceto en blanco utilizando el IDE de Arduino y subirlo a la Junta.
- Usted tendrá que importar el ST7735 y Adafruit GFX bibliotecas que se encuentran aquí: http://learn.adafruit.com/1-8-tft-display/graphics-library
- Retire el cable USB y conecte el plug 2,1 mm conector de alimentación de la ONU.
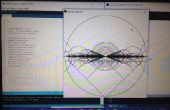
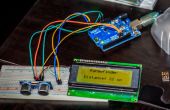
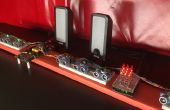
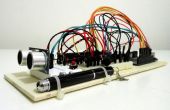
- Ahora tienes un trabajo barrido telémetro ultrasónico. Jugar con algunas de las variables en el código para cambiar la velocidad del servo y forma que los resultados se representan gráficamente en la pantalla.
Este código procesa los datos de un telémetro ultrasónico montado sobre un servo
El servo barrerá 180 grados
Datos del telémetro ultrasónico se trazan en la pantalla
Para el desbloqueo, puede utilizar cualquiera (4 o) 5 pernos
#define sclk 4
#define mosi 5
#define cs 6
#define dc 7
#define rst 8 / esto puede conectar el reset Arduino
Utilice estos pasadores para el escudo!
#define sclk 13
#define mosi 11
#define cs 10
#define dc 8
#define rst 0 / / esto puede conectar el reset Arduino
#include < Adafruit_GFX.h > / / Biblioteca de gráficos de base
#include < Adafruit_ST7735.h > / / específicos de Hardware de biblioteca
#include < math.h >
#include < SPI.h >
#include < Servo.h >
#if defined(__SAM3X8E__)
#undef __FlashStringHelper::F(string_literal)
#define F(string_literal) string_literal
#endif
Tft de Adafruit_ST7735 = Adafruit_ST7735 (cs, dc, rst);
flotador p = 3.1415926;
uint16_t x = 0;
uint16_t y = 0;
ángulo de flotador = 0;
flotador ángulo2 = 0;
flotador de ángulo1 = 0;
int adelante = 1;
sensor int = 0;
doble distancia = 0;
uint16_t px = 0;
uint16_t py = 0;
doble escala =. 4;
int i = 0;
doble velocidad = 0,02;
desplazamiento del flotador = 10;
int cuenta = 0;
int pos = 0;
Servo servo;
int servopin = 9;
void setup(void) {}
Conecte el servo y sistema de posición del centro
servo.Attach(servopin);
Delay(500);
servo.Write(90);
Delay(500);
servo.Detach(); Separar antes de enviar comandos de la pantalla (interfaz SPI utiliza mismo temporizadores son Biblioteca Servo)
tft.initR(INITR_BLACKTAB); inicializar una ficha de chip, negro ST7735S
Si la envoltura de plástico de tu TFT tiene una ficha roja, utilice lo siguiente:
tft.initR(INITR_REDTAB); inicializar una ficha de chip, rojo ST7735R
Si la envoltura de plástico de tu TFT tiene una ficha verde, utilice lo siguiente:
tft.initR(INITR_GREENTAB); inicializar una ficha de chip, verde ST7735R
Hacer una pantalla negra y luego imprimir fondo (texto y arcos)
tft.fillScreen(ST7735_BLACK);
tft.setCursor (0, 152);
TFT.Print ("1m 2m 3m");
tft.setCursor (0, 0);
TFT.Print("scanning");
drawcircles();
ángulo1 = atan((float)tft.width()/((tft.height()/2.0)-offset));
ángulo2 = constantio - ángulo1;
}
void loop() {}
Calcular la posición de servo (servo es 0-180degrees mientras que variable de ángulo en radianes)
pos = 180.0-180.0*(angle/p);
distancia = analogRead(sensor);
Atach servo al inicio de cada ciclo
servo.Attach(servopin);
Delay(15);
servo.Write(POS);
Este código convierte cooridantes polar sensor de coordenadas x-y
Esto determina qué píxeles para dibujar los datos del sensor en
El código varía ligeramente según el cuadrante del ángulo
if(Angle<angle1) {}
x = (uint16_t) (tft.height()/2-offset) * tan(angle);
y = desplazamiento (uint16_t);
PX = escala * distancia * sin(angle);
py = tft.height () / 2 - escala * distancia * cos(angle);
} else if (ángulo <(M_PI/2.0)) {}
y = (uint16_t) ((tft.height()) / 2 - tft.width() / tan(angle));
x = tft.width();
PX = escala * distancia * sin(angle);
py = tft.height () / 2 - escala * distancia * cos(angle);
} else if(angle<angle2) {}
y = (uint16_t) ((tft.height()) / 2 + tft.width() / tan(M_PI-angle));
x = tft.width();
PX = escala * distancia * sin(M_PI-angle);
py = tft.height () / 2 + escala * distancia * cos(M_PI-angle);
} else if(angle>angle2) {}
x = (uint16_t) (tft.height()/2-offset) * tan(M_PI-angle);
y = (uint16_t) (tft.height()-offset);
PX = escala * distancia * sin(M_PI-angle);
py = tft.height () / 2 + escala * distancia * cos(M_PI-angle);
}
Separar el servo después de que ha llegado a su posición para el ciclo y antes de escribir comandos de visualización
Delay(15);
servo.Detach();
Dibujar una línea que representa la dirección que apunta el sensor
tft.drawLine (0, tft.height () / 2, x, y, ST7735_GREEN);
tft.drawLine (0, tft.height () / 2, x, y, ST7735_BLACK);
Dibuja un círculo para el sensor
tft.fillCircle (px, py, 1, ST7735_RED);
Como dibujar objetos es computacionalmente intensivo, los arcos verdes sólo se dibujan cada 30 ciclos
Si (cuenta > = 30) {}
cuenta = 0;
drawcircles();
TFT.Print(".");
}
cuenta ++;
Este código cambia la dirección, que el servo gira cuando llega al final de cada barrido (0 o 180 grados)
El código incluye volver a dibujar el texto y los arcos como la pantalla se borra al final de cada barrido
{if(Forward==0)}
ángulo = velocidad de ángulo;
Si (ángulo < = 0) {}
ángulo = 0;
adelante = 1;
tft.fillScreen(ST7735_BLACK);
tft.setCursor (0, 152);
TFT.Print ("1m 2m 3m");
tft.setCursor (0, 0);
TFT.Print("scanning");
cuenta = 0;
drawcircles();
}
} else {}
ángulo ángulo = velocidad;
Si (ángulo > = constantio) {}
ángulo = constantio;
adelante = 0;
tft.fillScreen(ST7735_BLACK);
tft.setCursor (0, 152);
TFT.Print ("1m 2m 3m");
tft.setCursor (0, 0);
TFT.Print("scanning");
cuenta = 0;
drawcircles();
}
}
}
Una función para dibujar círculos
void drawcircles() {}
tft.drawCircle (0, tft.height () / 2, (tft.height) / 4-20, ST7735_GREEN);
tft.drawCircle (0, tft.height () / 2, (tft.height) / 2-20, ST7735_GREEN);
tft.drawCircle (0, tft.height () / 2, (tft.width)-20, ST7735_GREEN);
}
