Paso 5: Paso 5: el código

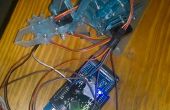
Muy bien por lo que el código se adjunta y publicado a continuación. La primera mitad del código identifica los distintos materiales necesarios para controlar el brazo. La parte inferior la mitad del código dice arduino qué hacer cuando usted gire las macetas a una cierta dirección. También debo señalar que he podido engañar el código que permite ejecutan dos servos a la vez en lugar de uno en uno. Esto permite que los hombros mover juntos.
<p>/*<br> Arduino Robotic Arm by Amidou Kante; Torigac July 14th, 2014 Simple robotic arm that is controlled by three pots. */ #include <servo.h> Servo base; // Tells the arduino what servos we are going to Servo left; // use. I name them by they function or location. Servo right; Servo claw; int potpin = 0; //Tells the arduino the locations of the pots int potpin2 = 1; int potpin3 = 2; int val; //Tells the arduino what variable to use to store int val2; // the position when turned. int val3; void setup() { base.attach(3); left.attach(5); //Tells the arduino where the servos are plugged right.attach(6); // in. claw.attach(11); } void loop(){ { val = analogRead(potpin); //tells arduino which pot controlls val = map(val, 0, 1023, 0, 179); //current servo, and then maps base.write(val); //the dial the pot is on to move the servo delay(15); //waits for the servo to move }{ val2 = analogRead(potpin2); val2 = map(val2, 0, 1023, 0, 179); left.write(val2); delay(15); { val2 = analogRead(potpin2); val2 = map(val2, 0, 1023, 0, 179); right.write(val2); delay(15); } { val3 = analogRead(potpin3); val3 = map(val3, 0, 1023, 0, 179); claw.write(val3); delay(15); } } }</servo.h></p>
![BRAZO robótico de la Xbox 360 [ARDUINO]: Axioma brazo BRAZO robótico de la Xbox 360 [ARDUINO]: Axioma brazo](https://foto.askix.com/thumb/170x110/a/73/a73fe094730384e00961d770d1d63f61.jpg)
