Paso 4: Configuración del software - Arduino con escudo de WiFi

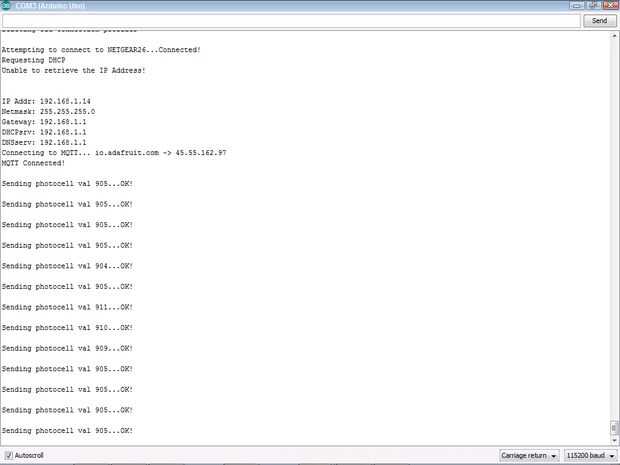
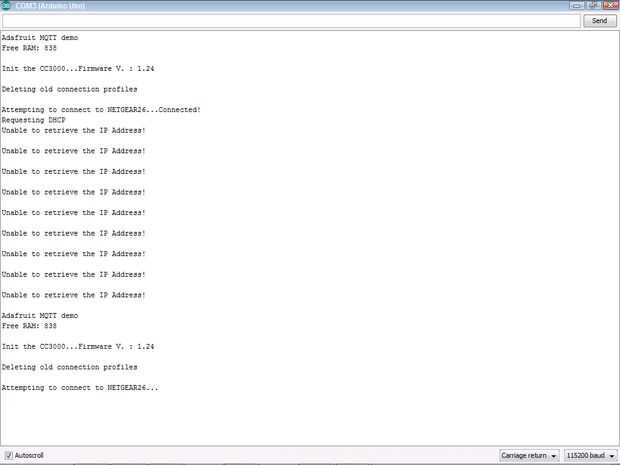
Este paso puede o puede no aplicarse a usted, realmente depende de qué hardware tienes. La placa Arduino o clon debería aceptar cualquier código de Arduino con que se programa pero el escudo de WiFi tienes mayo no funciona con el código que voy a mostrarte. Tengo un Linksprite CC3000. La mayoría CC3000 codificados la misma manera, sólo tienes que encontrar las bibliotecas que trabajan con él y ajustan cosas dentro del código principal para que funcione. Con el Linksprite encontré que la biblioteca de Adafruit CC3000 funciona perfecto con mi escudo y así sucede que Adafruit IO es la misma empresa.
TL; DR: WiFi su escudo debe codificarse de manera diferente y puede requerir más esfuerzo de tu parte.
Aquí está el código que usé:
#include "Adafruit_SleepyDog.h" #include "Adafruit_CC3000.h" #include "SPI.h" #include "utility/debug.h" #include "Adafruit_MQTT.h" #include "Adafruit_MQTT_CC3000.h"</p><p>int photocellPin = 0; // the cell and 10K pulldown are connected to a0</p><p>/*************************** CC3000 Pins ***********************************/</p><p>#define ADAFRUIT_CC3000_IRQ 3 // MUST be an interrupt pin! #define ADAFRUIT_CC3000_VBAT 5 // VBAT & CS can be any digital pins. #define ADAFRUIT_CC3000_CS 10 // Use hardware SPI for the remaining pins // On an UNO, SCK = 13, MISO = 12, and MOSI = 11</p><p>/************************* WiFi Access Point *********************************/</p><p>#define WLAN_SSID "---YOUR WIFI SSID (NAME)---" // can't be longer than 32 characters! #define WLAN_PASS "---YOUR WIFI PASSWORD---" #define WLAN_SECURITY WLAN_SEC_WPA2 // Can be: WLAN_SEC_UNSEC, WLAN_SEC_WEP, // WLAN_SEC_WPA or WLAN_SEC_WPA2</p><p>/************************* Adafruit.io Setup *********************************/</p><p>#define AIO_SERVER "io.adafruit.com" #define AIO_SERVERPORT 1883 #define AIO_USERNAME "---YOUR ADAFRUIT USERNAME---" #define AIO_KEY "YOUR DASHBOARDS ADAFRUIT KEY" // it's the yellow square with the key icon on your dashboard</p><p>/************ Global State (you don't need to change this!) ******************</p><p>/ Setup the main CC3000 class, just like a normal CC3000 sketch. Adafruit_CC3000 cc3000 = Adafruit_CC3000(ADAFRUIT_CC3000_CS, ADAFRUIT_CC3000_IRQ, ADAFRUIT_CC3000_VBAT);</p><p>// Store the MQTT server, username, and password in flash memory. // This is required for using the Adafruit MQTT library. const char MQTT_SERVER[] PROGMEM = AIO_SERVER; const char MQTT_USERNAME[] PROGMEM = AIO_USERNAME; const char MQTT_PASSWORD[] PROGMEM = AIO_KEY;</p><p>// Setup the CC3000 MQTT class by passing in the CC3000 class and MQTT server and login details. Adafruit_MQTT_CC3000 mqtt(&cc3000, MQTT_SERVER, AIO_SERVERPORT, MQTT_USERNAME, MQTT_PASSWORD);</p><p>// You don't need to change anything below this line! #define halt(s) { Serial.println(F( s )); while(1); }</p><p>// CC3000connect is a helper function that sets up the CC3000 and connects to // the WiFi network. See the cc3000helper.cpp tab above for the source! boolean CC3000connect(const char* wlan_ssid, const char* wlan_pass, uint8_t wlan_security);</p><p>/****************************** Feeds ***************************************</p><p>/ Setup a feed called 'photocell' for publishing. // Notice MQTT paths for AIO follow the form: <username>/feeds/<feedname> const char PHOTOCELL_FEED[] PROGMEM = AIO_USERNAME "/feeds/photocell"; Adafruit_MQTT_Publish photocell = Adafruit_MQTT_Publish(&mqtt, PHOTOCELL_FEED);</feedname></username></p><p>/*************************** Sketch Code ************************************/</p><p>void setup() { Serial.begin(115200);</p><p> Serial.println(F("Adafruit MQTT demo"));</p><p> Serial.print(F("Free RAM: ")); Serial.println(getFreeRam(), DEC);</p><p> // Initialise the CC3000 module Serial.print(F("\nInit the CC3000...")); if (!cc3000.begin()) halt("Failed");</p><p> mqtt.subscribe(&onoffbutton);</p><p> while (! CC3000connect(WLAN_SSID, WLAN_PASS, WLAN_SECURITY)) { Serial.println(F("Retrying WiFi")); delay(1000); } } uint32_t x = analogRead(photocellPin); // This is important! This part took me forever to figure out.</p><p>// You NEED the "uint32_t x =" part if you plan on trying to add a different sensor, then just follow "x" through </p><p>// the rest of the code</p><p>void loop() { x = analogRead(photocellPin); // Make sure to reset watchdog every loop iteration! Watchdog.reset();</p><p> // Ensure the connection to the MQTT server is alive (this will make the first // connection and automatically reconnect when disconnected). See the MQTT_connect // function definition further below. MQTT_connect();</p><p> // this is our 'wait for incoming subscription packets' busy subloop Adafruit_MQTT_Subscribe *subscription; while ((subscription = mqtt.readSubscription(1000))) { if (subscription == &onoffbutton) { Serial.print(F("Got: ")); Serial.println((char *)onoffbutton.lastread); } }</p><p> // Now we can publish stuff! Serial.print(F("\nSending photocell val ")); Serial.print(x); Serial.print("..."); if (! photocell.publish(x)) { Serial.println(F("Failed")); } else { Serial.println(F("OK!")); }</p><p> // ping the server to keep the mqtt connection alive if(! mqtt.ping()) { Serial.println(F("MQTT Ping failed.")); }</p><p>}</p><p>// Function to connect and reconnect as necessary to the MQTT server. // Should be called in the loop function and it will take care if connecting. void MQTT_connect() { int8_t ret;</p><p> // Stop if already connected. if (mqtt.connected()) { return; }</p><p> Serial.print("Connecting to MQTT... ");</p><p> while ((ret = mqtt.connect()) != 0) { // connect will return 0 for connected Serial.println(mqtt.connectErrorString(ret)); if (ret < 0) CC3000connect(WLAN_SSID, WLAN_PASS, WLAN_SECURITY); // y0w, lets connect to wifi again Serial.println("Retrying MQTT connection in 5 seconds..."); mqtt.disconnect(); delay(5000); // wait 5 seconds } Serial.println("MQTT Connected!"); }
