Paso 4: Código Android
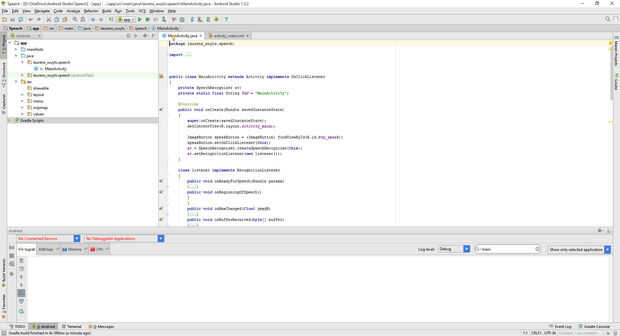
El código de android, usted necesitará hacer varias cosas.
En primer lugar, sólo en la clase mainactivity, necesitará añadir dos cosas. Lo primero es un SpeechRecognizer y lo segundo es una etiqueta para la depuración de su aplicación.
private SpeechRecognizer sr; private static final String TAG = "MainActivity";
Ahora, en la función onCreate, necesitará añadir estas cuatro líneas. Los dos primeros son para que el botón para hacer algo, el tercero y cuarto son el reconocimiento de voz.
ImageButton speakButton = (ImageButton) findViewById(R.id.btn_speak); speakButton.setOnClickListener(this); sr = SpeechRecognizer.createSpeechRecognizer(this); sr.setRecognitionListener(new listener());
Después de la función onCreate necesitará realizar una nueva clase para el reconocimiento de voz.
class listener implements RecognitionListener { public void onReadyForSpeech(Bundle params) {} public void onBeginningOfSpeech() {} public void onRmsChanged(float rmsdB) {} public void onBufferReceived(byte[] buffer) {} public void onEndOfSpeech() {} public void onError(int error) { if(error != 7) { Log.d(TAG, "error " + error); } } public void onResults(Bundle results) { String str = ""; // Create new empty string // Get the results from the speech recognizer ArrayList data = results.getStringArrayList(SpeechRecognizer.RESULTS_RECOGNITION); // If there is data if(data.size() != 0) { // Add all the data to a string for (int i = 0; i < data.size(); i++) { Log.d(TAG, "result " + data.get(i)); str += data.get(i); str += " "; } // Create a lowercase string str = str.toLowerCase(); // Send the GET request with message String message = "message=" + str; new Background_get().execute(message); } } public void onPartialResults(Bundle partialResults) { Log.d(TAG, "onPartialResults"); } public void onEvent(int eventType, Bundle params) { Log.d(TAG, "onEvent " + eventType); } } Después de esta clase necesita añadir una función onClick que se activa al pulsar el botón.
public void onClick(View v) { if (v.getId() == R.id.btn_speak) { // Activate the speech listener Intent intent = new Intent(RecognizerIntent.ACTION_RECOGNIZE_SPEECH); intent.putExtra(RecognizerIntent.EXTRA_LANGUAGE_MODEL,RecognizerIntent.LANGUAGE_MODEL_FREE_FORM); intent.putExtra(RecognizerIntent.EXTRA_CALLING_PACKAGE,"voice.recognition.test"); intent.putExtra(RecognizerIntent.EXTRA_MAX_RESULTS,5); sr.startListening(intent); } } La única cosa que necesitamos agregar ahora es la clase que se encarga de enviar las peticiones GET.
Es la misma clase que usé en mi anterior instructables.
/*****************************************************/ /* This is a background process for connecting */ /* to the arduino server and sending */ /* the GET request with the added data */ /* */ /* !! INTERNET Permission !! */ /* */ /*****************************************************/ private class Background_get extends AsyncTask<String, Void, String> { protected String doInBackground(String... params) { try { /* Change the IP to the IP you set in the arduino sketch */ URL url = new URL("http://192.168.1.177/?" + params[0]); HttpURLConnection connection = (HttpURLConnection) url.openConnection(); BufferedReader in = new BufferedReader(new InputStreamReader(connection.getInputStream())); StringBuilder result = new StringBuilder(); String inputLine; while ((inputLine = in.readLine()) != null) result.append(inputLine).append("\n"); in.close(); connection.disconnect(); return result.toString(); } catch (IOException e) { e.printStackTrace(); } return null; } } Esta fue la codificación de la aplicación. Lo único que debemos hacer ahora es agregar los permisos a tu aplicación, para que pueda usar el discurso y la internet.
