Paso 3: Cómo programar el tablero de Galileo:
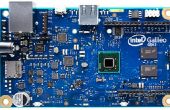
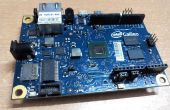
Para empezar carga uno de los siguientes programas con el IDE de Arduino en su Intel Galileo Junta Gen 2.
El Monitor Serial proporcionado en el IDE de Arduino le dará feedback sobre el progreso de lo timelapse.
1. un programa simple para un lapso de tiempo:
/*<br> Simple Timelapse: This program shoots a timelapse with the given parameters: shots, shutter and wait. With this setup the board will take 300 pictures with 0.5 seconds exposure every 2.5 seconds. The progress will be shown in the serial monitor. */ int shots = 300; // Number of pictures to be shot int shutter = 500; // Shutter speed (in ms) int wait = 2500; // Waiting time between the pictures (in ms) void setup() { pinMode(13, OUTPUT); // Set Pin 13 as output Serial.begin(9600); delay(5000); // Wait 5 seconds to get ready Serial.println("Starting Timelapse."); for (int i = 1; i <=shots; i++) { // Repeat shooting pictures until all shots are done shoot(); showProgress(i); delay(wait); } Serial.println("Timelapse complete."); } // Force the camera to take a picture with the given shutter speed void shoot() { digitalWrite(13, HIGH); delay(shutter); digitalWrite(13, LOW); } // Show progress on the Serial Monitor void showProgress(int i){ Serial.print("Pictures shot: "); Serial.print(i); Serial.print("/"); Serial.print(shots); Serial.print(", Time remaining: ca. "); // Evaluate the remaining time in minutes and seconds Serial.print((shots-i)*(shutter+wait)/60000); Serial.print("m "); Serial.print(((shots-i)*(shutter+wait)%60000)/1000); Serial.print("s\n"); } void loop() { delay(1000); } 2. una versión más avanzada con cambio de exposición:
/*<br> Timelapse with changeing exposure. This program shoots a timelapse starting with the shutter speed given in shutterStart and then adapts the time every shoot until it reaches the time given in ShutterEnd. The progress will be shown in the serial monitor. */ int shots = 120; // Number of pictures int shutterStart = 500; // Shutter speed at the beginning of the timelapse(in ms) int shutterEnd = 2000; // Shutter speed at the end of the timelapse (in ms) int wait = 4000; // Waiting time between the pictures (in ms) void setup() { pinMode(13, OUTPUT); // Set pin 13 as output Serial.begin(9600); delay(5000); // Wait 5 seconds to get ready Serial.println("Taking initializing start picture."); //Sometimes the first picture has a wrong exposure, therefore take initializing picture shoot(1000); Serial.println("Done. Waiting for the camera."); delay(3000); //The camera needs some time to process the image Serial.println("Starting Timelapse."); for (int i = 1; i <=shots; i++) { shoot(shutterStart + (shutterEnd-shutterStart)*i/shots); // Adapt the exposure over time showProgress(i); delay(wait); } Serial.println("Timelapse complete."); } // Force the camera to takes a picture with shutter speed x void shoot(int x) { digitalWrite(13, HIGH); delay(x); digitalWrite(13, LOW); } // Show Progress on the Serial Monitor void showProgress(int i){ int shutter = (shutterStart + shutterEnd)/2; // Average shutter speed for time calculation Serial.print("Pictures shot: "); Serial.print(i); Serial.print("/"); Serial.print(shots); Serial.print(", Shutter: "); // Print current shutter speed: Serial.print(shutterStart + (shutterEnd-shutterStart)*i/shots); Serial.print("s, Time remaining: ca. "); // Evaluate the remaining time in minutes and seconds Serial.print((shots-i)*(shutter+wait)/60000); Serial.print("m "); Serial.print(((shots-i)*(shutter+wait)%60000)/1000); Serial.print("s\n"); } void loop() { delay(1000); }<br> Por supuesto es posible editar estos programas para lograr objetivos especiales como por ejemplo un tiempo de espera cambiar con el tiempo o lo que se desea.
