Paso 5: Punto Muncher: Resumen

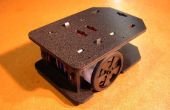
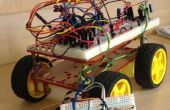
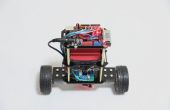
Por lo tanto, hice mi robot, Punto Muncher, utilizando un Arduino Uno, Escudo del Motory un módulo de Bluetooth 4.0. El chasis fue hecho de polietileno de alta densidad, una tabla de cortar robaron de mi esposa. Los motores y los neumáticos eran de eBay.
Ahora, acerca de cualquier robot de trabajo, como indicó, así Google lejos y seleccione un robot construirá te gusta.
Por supuesto, todo lo que tenía cada quiero saber se puede encontrar en
Sólo estoy diciendo '.
Pero el código, esa es la parte que desea enfocar. Realmente, nuestro robot tiene sólo un nervios y músculos, el cerebro estará realmente en el PC, el robot no es
- Calcula la información de la brújula.
- Envía la información de la brújula a la PC.
- Lee los códigos de movimiento desde el PC.
- Se traduce el código de movimiento recibido en una activación del motor.
Eso es todo. Bastante simple.
1 2 3 4 5 6 7 8 9 10 11 12 13 14 15 16 17 18 19 20 21 22 23 24 25 26 27 28 29 30 31 32 33 34 35 36 37 38 39 40 41 42 43 44 45 46 47 48 49 50 51 52 53 54 55 56 57 58 59 60 61 62 63 64 65 66 67 68 69 70 71 72 73 74 75 76 77 78 79 80 81 82 83 84 85 86 87 88 89 90 91 92 93 94 95 96 97 98 99 100 101 102 103 104 105 106 107 108 109 110 111 112 113 114 115 116 117 118 119 120 121 122 123 124 125 126 127 128 129 130 131 132 133 134 135 136 137 138 139 140 141 142 143 144 145 146 147 148 149 150 151 152 153 154 155 156 157 158 159 160 161 162 163 164 165 166 167 168 169 170 171 172 173 174 175 176 177 178 179 180 181 182 183 184 185 186 187 188 189 190 191 192 193 194 195 196 197 198 199 200 201 202 203 204 205 206 207 208 209 210 | <span style="color: rgb(136,136,136);">//I've been using Zombie_3_6_RC in Processing to interact.</span> <span style="color: rgb(136,136,136);">// Reference the I2C Library</span> <span style="color: rgb(85,119,153);">#include </span><span style="color: rgb(85,119,153);"><Wire.h></span> <span style="color: rgb(136,136,136);">// Reference the HMC5883L Compass Library</span> <span style="color: rgb(85,119,153);">#include </span><span style="color: rgb(85,119,153);"><HMC5883L.h></span> <span style="color: rgb(136,136,136);">// Store our compass as a variable.</span> HMC5883L compass; <span style="color: rgb(136,136,136);">// Record any errors that may occur in the compass.</span> <span style="color: rgb(51,51,153);font-weight: bold;">int</span> error <span style="color: rgb(51,51,51);">=</span> <span style="color: rgb(0,0,221);font-weight: bold;">0</span>; <span style="color: rgb(136,136,136);">//int pwm_a = 10; //PWM control for motor outputs 1 and 2 is on digital pin 10</span> <span style="color: rgb(51,51,153);font-weight: bold;">int</span> pwm_a <span style="color: rgb(51,51,51);">=</span> <span style="color: rgb(0,0,221);font-weight: bold;">3</span>; <span style="color: rgb(136,136,136);">//PWM control for motor outputs 1 and 2 is on digital pin 3</span> <span style="color: rgb(51,51,153);font-weight: bold;">int</span> pwm_b <span style="color: rgb(51,51,51);">=</span> <span style="color: rgb(0,0,221);font-weight: bold;">11</span>; <span style="color: rgb(136,136,136);">//PWM control for motor outputs 3 and 4 is on digital pin 11</span> <span style="color: rgb(51,51,153);font-weight: bold;">int</span> dir_a <span style="color: rgb(51,51,51);">=</span> <span style="color: rgb(0,0,221);font-weight: bold;">12</span>; <span style="color: rgb(136,136,136);">//dir control for motor outputs 1 and 2 is on digital pin 12</span> <span style="color: rgb(51,51,153);font-weight: bold;">int</span> dir_b <span style="color: rgb(51,51,51);">=</span> <span style="color: rgb(0,0,221);font-weight: bold;">13</span>; <span style="color: rgb(136,136,136);">//dir control for motor outputs 3 and 4 is on digital pin 13</span> <span style="color: rgb(51,51,153);font-weight: bold;">int</span> lowspeed <span style="color: rgb(51,51,51);">=</span> <span style="color: rgb(0,0,221);font-weight: bold;">120</span>; <span style="color: rgb(51,51,153);font-weight: bold;">int</span> highspeed <span style="color: rgb(51,51,51);">=</span> <span style="color: rgb(0,0,221);font-weight: bold;">140</span>; <span style="color: rgb(136,136,136);">//Distance away</span> <span style="color: rgb(51,51,153);font-weight: bold;">int</span> distance; <span style="color: rgb(136,136,136);">//Sets the duration each keystroke captures the motors.</span> <span style="color: rgb(51,51,153);font-weight: bold;">int</span> keyDuration <span style="color: rgb(51,51,51);">=</span> <span style="color: rgb(0,0,221);font-weight: bold;">10</span>; <span style="color: rgb(51,51,153);font-weight: bold;">int</span> iComp; <span style="color: rgb(51,51,153);font-weight: bold;">void</span> <span style="color: rgb(0,102,187);font-weight: bold;">setup</span>() { Serial.begin(<span style="color: rgb(0,0,221);font-weight: bold;">9600</span>); Wire.begin(); <span style="color: rgb(136,136,136);">// Start the I2C interface.</span> Serial.println(<span style="background-color: rgb(255,240,240);">"Constructing new HMC5883L"</span>); compass <span style="color: rgb(51,51,51);">=</span> HMC5883L(); <span style="color: rgb(136,136,136);">// Construct a new HMC5883 compass.</span> Serial.println(<span style="background-color: rgb(255,240,240);">"Setting scale to +/- 1.3 Ga"</span>); error <span style="color: rgb(51,51,51);">=</span> compass.SetScale(<span style="color: rgb(102,0,238);font-weight: bold;">1.3</span>); <span style="color: rgb(136,136,136);">// Set the scale of the compass</span> error <span style="color: rgb(51,51,51);">=</span> compass.SetMeasurementMode(Measurement_Continuous); <span style="color: rgb(136,136,136);">// Set the measurement mode to Continuous</span> pinMode(pwm_a, OUTPUT); <span style="color: rgb(136,136,136);">//Set control pins to be outputs</span> pinMode(pwm_b, OUTPUT); pinMode(dir_a, OUTPUT); pinMode(dir_b, OUTPUT); analogWrite(pwm_a, <span style="color: rgb(0,0,221);font-weight: bold;">0</span>); <span style="color: rgb(136,136,136);">//set both motors to run at (100/255 = 39)% duty cycle (slow) </span> analogWrite(pwm_b, <span style="color: rgb(0,0,221);font-weight: bold;">0</span>); pinMode (<span style="color: rgb(0,0,221);font-weight: bold;">2</span>,OUTPUT);<span style="color: rgb(136,136,136);">//attach pin 2 to vcc</span> pinMode (<span style="color: rgb(0,0,221);font-weight: bold;">5</span>,OUTPUT);<span style="color: rgb(136,136,136);">//attach pin 5 to GND</span> <span style="color: rgb(136,136,136);">// initialize serial communication:</span> Serial.begin(<span style="color: rgb(0,0,221);font-weight: bold;">9600</span>); } <span style="color: rgb(51,51,153);font-weight: bold;">void</span> <span style="color: rgb(0,102,187);font-weight: bold;">loop</span>() { <span style="color: rgb(136,136,136);">// Retrive the raw values from the compass (not scaled).</span> MagnetometerRaw raw <span style="color: rgb(51,51,51);">=</span> compass.ReadRawAxis(); <span style="color: rgb(136,136,136);">// Retrived the scaled values from the compass (scaled to the configured scale).</span> MagnetometerScaled scaled <span style="color: rgb(51,51,51);">=</span> compass.ReadScaledAxis(); <span style="color: rgb(136,136,136);">// Values are accessed like so:</span> <span style="color: rgb(51,51,153);font-weight: bold;">int</span> MilliGauss_OnThe_XAxis <span style="color: rgb(51,51,51);">=</span> scaled.XAxis;<span style="color: rgb(136,136,136);">// (or YAxis, or ZAxis)</span> <span style="color: rgb(136,136,136);">// Calculate heading when the magnetometer is level, then correct for signs of axis.</span> <span style="color: rgb(51,51,153);font-weight: bold;">float</span> heading <span style="color: rgb(51,51,51);">=</span> atan2(scaled.YAxis, scaled.XAxis); <span style="color: rgb(136,136,136);">// Once you have your heading, you must then add your 'Declination Angle', which is the 'Error' of the magnetic field in your location.</span> <span style="color: rgb(136,136,136);">// Find yours here: http://www.magnetic-declination.com/</span> <span style="color: rgb(136,136,136);">// Mine is: 2� 37' W, which is 2.617 Degrees, or (which we need) 0.0456752665 radians, I will use 0.0457</span> <span style="color: rgb(136,136,136);">// If you cannot find your Declination, comment out these two lines, your compass will be slightly off.</span> <span style="color: rgb(51,51,153);font-weight: bold;">float</span> declinationAngle <span style="color: rgb(51,51,51);">=</span> <span style="color: rgb(102,0,238);font-weight: bold;">0.0457</span>; heading <span style="color: rgb(51,51,51);">+=</span> declinationAngle; <span style="color: rgb(136,136,136);">// Correct for when signs are reversed.</span> <span style="color: rgb(0,136,0);font-weight: bold;">if</span>(heading <span style="color: rgb(51,51,51);"><</span> <span style="color: rgb(0,0,221);font-weight: bold;">0</span>) heading <span style="color: rgb(51,51,51);">+=</span> <span style="color: rgb(0,0,221);font-weight: bold;">2</span><span style="color: rgb(51,51,51);">*</span>PI; <span style="color: rgb(136,136,136);">// Check for wrap due to addition of declination.</span> <span style="color: rgb(0,136,0);font-weight: bold;">if</span>(heading <span style="color: rgb(51,51,51);">></span> <span style="color: rgb(0,0,221);font-weight: bold;">2</span><span style="color: rgb(51,51,51);">*</span>PI) heading <span style="color: rgb(51,51,51);">-=</span> <span style="color: rgb(0,0,221);font-weight: bold;">2</span><span style="color: rgb(51,51,51);">*</span>PI; <span style="color: rgb(136,136,136);">// Convert radians to degrees for readability.</span> <span style="color: rgb(51,51,153);font-weight: bold;">float</span> headingDegrees <span style="color: rgb(51,51,51);">=</span> heading <span style="color: rgb(51,51,51);">*</span> <span style="color: rgb(0,0,221);font-weight: bold;">180</span><span style="color: rgb(51,51,51);">/</span>M_PI; <span style="color: rgb(136,136,136);">// Normally we would delay the application by 66ms to allow the loop</span> <span style="color: rgb(136,136,136);">// to run at 15Hz (default bandwidth for the HMC5883L).</span> <span style="color: rgb(136,136,136);">// However since we have a long serial out (104ms at 9600) we will let</span> <span style="color: rgb(136,136,136);">// it run at its natural speed.</span> <span style="color: rgb(136,136,136);">// delay(66);</span> <span style="color: rgb(136,136,136);">//This throttles how much data is sent to Python code. </span> <span style="color: rgb(136,136,136);">//Basically, it updates every second (10 microsecond delay X 100 iComps)</span> <span style="color: rgb(0,136,0);font-weight: bold;">if</span> (iComp <span style="color: rgb(51,51,51);">>=</span> <span style="color: rgb(0,0,221);font-weight: bold;">30</span>){ <span style="color: rgb(51,51,153);font-weight: bold;">int</span> adjHeading <span style="color: rgb(51,51,51);">=</span> <span style="color: rgb(0,0,221);font-weight: bold;">0</span>; <span style="color: rgb(136,136,136);">//The "floor" part makes the float into an integer, rounds it up.</span> headingDegrees <span style="color: rgb(51,51,51);">=</span> floor(headingDegrees); <span style="color: rgb(0,136,0);font-weight: bold;">if</span> (headingDegrees <span style="color: rgb(51,51,51);">>=</span> <span style="color: rgb(0,0,221);font-weight: bold;">280</span>){ adjHeading <span style="color: rgb(51,51,51);">=</span> map(headingDegrees, <span style="color: rgb(0,0,221);font-weight: bold;">280</span>, <span style="color: rgb(0,0,221);font-weight: bold;">360</span>, <span style="color: rgb(0,0,221);font-weight: bold;">0</span>, <span style="color: rgb(0,0,221);font-weight: bold;">79</span>); } <span style="color: rgb(0,136,0);font-weight: bold;">else</span> <span style="color: rgb(0,136,0);font-weight: bold;">if</span> (headingDegrees <span style="color: rgb(51,51,51);"><=</span> <span style="color: rgb(0,0,221);font-weight: bold;">279</span>) { adjHeading <span style="color: rgb(51,51,51);">=</span> map(headingDegrees, <span style="color: rgb(0,0,221);font-weight: bold;">0</span>, <span style="color: rgb(0,0,221);font-weight: bold;">279</span>, <span style="color: rgb(0,0,221);font-weight: bold;">80</span>, <span style="color: rgb(0,0,221);font-weight: bold;">360</span>); } Serial.println(adjHeading); iComp<span style="color: rgb(51,51,51);">=</span><span style="color: rgb(0,0,221);font-weight: bold;">0</span>; } iComp<span style="color: rgb(51,51,51);">++</span>; delay(<span style="color: rgb(0,0,221);font-weight: bold;">10</span>); <span style="color: rgb(136,136,136);">//For serial stability.</span> <span style="color: rgb(51,51,153);font-weight: bold;">int</span> val <span style="color: rgb(51,51,51);">=</span> Serial.read() <span style="color: rgb(51,51,51);">-</span> <span style="color: rgb(0,68,221);">'0'</span>; <span style="color: rgb(0,136,0);font-weight: bold;">if</span> (val <span style="color: rgb(51,51,51);">==</span> <span style="color: rgb(0,0,221);font-weight: bold;">1</span>) { Back(); } <span style="color: rgb(0,136,0);font-weight: bold;">else</span> <span style="color: rgb(0,136,0);font-weight: bold;">if</span> (val <span style="color: rgb(51,51,51);">==</span> <span style="color: rgb(0,0,221);font-weight: bold;">2</span>) { Right(); } <span style="color: rgb(0,136,0);font-weight: bold;">else</span> <span style="color: rgb(0,136,0);font-weight: bold;">if</span> (val <span style="color: rgb(51,51,51);">==</span> <span style="color: rgb(0,0,221);font-weight: bold;">3</span>) { Forward(); } <span style="color: rgb(0,136,0);font-weight: bold;">else</span> <span style="color: rgb(0,136,0);font-weight: bold;">if</span> (val <span style="color: rgb(51,51,51);">==</span> <span style="color: rgb(0,0,221);font-weight: bold;">4</span>) { Left(); } <span style="color: rgb(0,136,0);font-weight: bold;">else</span> <span style="color: rgb(0,136,0);font-weight: bold;">if</span> (val <span style="color: rgb(51,51,51);">==</span> <span style="color: rgb(0,0,221);font-weight: bold;">5</span>) { Stop(); } } <span style="color: rgb(51,51,153);font-weight: bold;">void</span> <span style="color: rgb(0,102,187);font-weight: bold;">Back</span>(){ <span style="color: rgb(136,136,136);">//Straight back</span> analogWrite(pwm_a, highspeed); analogWrite(pwm_b, highspeed); digitalWrite(dir_a, HIGH); <span style="color: rgb(136,136,136);">//Reverse motor direction, 1 high, 2 low</span> digitalWrite(dir_b, LOW); <span style="color: rgb(136,136,136);">//Reverse motor direction, 3 low, 4 high</span> delay(keyDuration); } <span style="color: rgb(51,51,153);font-weight: bold;">void</span> <span style="color: rgb(0,102,187);font-weight: bold;">Left</span>(){ <span style="color: rgb(136,136,136);">//Left</span> analogWrite(pwm_a, lowspeed); analogWrite(pwm_b, lowspeed); digitalWrite(dir_a, HIGH); <span style="color: rgb(136,136,136);">//Reverse motor direction, 1 high, 2 low</span> digitalWrite(dir_b, HIGH); <span style="color: rgb(136,136,136);">//Reverse motor direction, 3 low, 4 high</span> delay(keyDuration); } <span style="color: rgb(51,51,153);font-weight: bold;">void</span> <span style="color: rgb(0,102,187);font-weight: bold;">Right</span>(){ <span style="color: rgb(136,136,136);">//Right</span> analogWrite(pwm_a, lowspeed); analogWrite(pwm_b, lowspeed); digitalWrite(dir_a, LOW); <span style="color: rgb(136,136,136);">//Reverse motor direction, 1 high, 2 low</span> digitalWrite(dir_b, LOW); <span style="color: rgb(136,136,136);">//Reverse motor direction, 3 low, 4 high</span> delay(keyDuration); } <span style="color: rgb(51,51,153);font-weight: bold;">void</span> <span style="color: rgb(0,102,187);font-weight: bold;">Forward</span>(){ <span style="color: rgb(136,136,136);">//set both motors to run at 100% duty cycle (fast)</span> analogWrite(pwm_a, highspeed); analogWrite(pwm_b, highspeed); <span style="color: rgb(136,136,136);">//Straight forward</span> digitalWrite(dir_a, LOW); <span style="color: rgb(136,136,136);">//Set motor direction, 1 low, 2 high</span> digitalWrite(dir_b, HIGH); <span style="color: rgb(136,136,136);">//Set motor direction, 3 high, 4 low</span> delay(keyDuration); } <span style="color: rgb(51,51,153);font-weight: bold;">void</span> <span style="color: rgb(0,102,187);font-weight: bold;">Stop</span>(){ <span style="color: rgb(136,136,136);">//set both motors to run at 100% duty cycle (fast)</span> analogWrite(pwm_a, <span style="color: rgb(0,0,221);font-weight: bold;">0</span>); analogWrite(pwm_b, <span style="color: rgb(0,0,221);font-weight: bold;">0</span>); <span style="color: rgb(136,136,136);">//Straight forward</span> digitalWrite(dir_a, LOW); <span style="color: rgb(136,136,136);">//Set motor direction, 1 low, 2 high</span> digitalWrite(dir_b, HIGH); <span style="color: rgb(136,136,136);">//Set motor direction, 3 high, 4 low</span> delay(keyDuration); } |
