Paso 2: Escribir código en KEIL
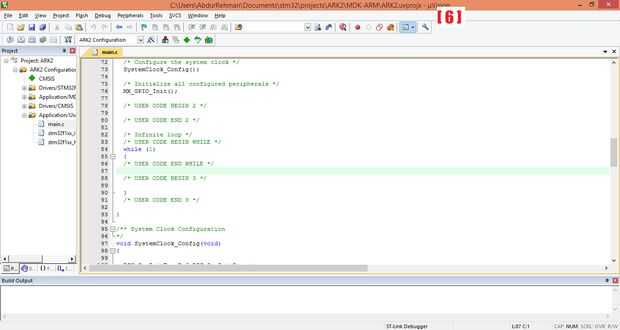
Ahora, en Keil, en la carpeta 'Configuración' ventana de proyecto. En abierto, '/ usuario de la aplicación' allí, abrir el archivo 'main.c'. Desplácese hacia abajo en a lazo como se muestra en la figura:
{Ver imagen [6]}
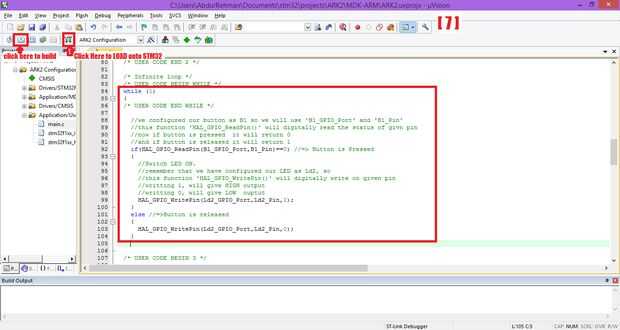
Ahora, aquí en esto mientras bucle escribiremos código para cambiar led encendido si el botón es apretado y lo apaga cuando el botón está en estado de liberación. Por lo tanto, escribir siguiendo las líneas de código mientras que lazo:
//we configured our button as B1 so we will use 'B1_GPIO_Port' and 'B1_Pin'//this function 'HAL_GPIO_ReadPin()' will digitally read the status of givn pin//now if button is pressed it will return 0//and if button is released it will return 1if(HAL_GPIO_ReadPin(B1_GPIO_Port,B1_Pin)==0) //=> Button is Pressed{ //Switch LED ON. //remember that we have configured our LED as Ld2, so //this function 'HAL_GPIO_WritePin()' will digitally write on given pin //writting 1, will give HIGH output //writting 0, will give LOW ouptut HAL_GPIO_WritePin(Ld2_GPIO_Port,Ld2_Pin,1);}else //=>Button is released{ HAL_GPIO_WritePin(Ld2_GPIO_Port,Ld2_Pin,0);} Ahora, usted Keil ventana debería tener este aspecto:
{Ver imagen [7]}
Ahora, después de esto, haga clic en crear botón como se muestra en la imagen anterior. Esto construirá proyecto. Ahora, haga clic en el botón "LOAD" cargar demasiado este proyecto sobre su tablero del STM32 como se muestra en la imagen anterior.
