Paso 3: Añadir el código
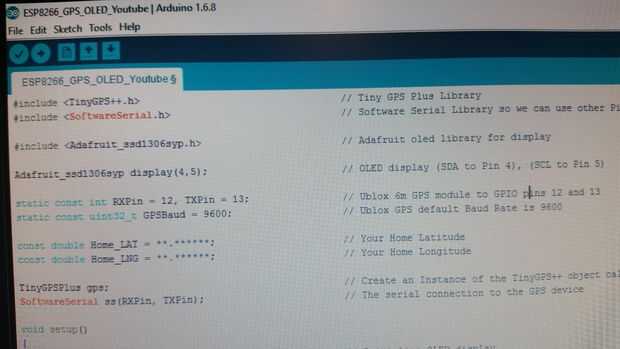
En primer lugar, supongo que tienes el Arduino IDE ya instalado (preferiblemente 1.6.4 o posterior) y que ha instalado todas las bibliotecas necesarias tales como: TinyGPS plus Serial de Softwarey la biblioteca de pantalla OLED de Adafruit . Usted puede conseguir éstos de Github.
Si no es así, instale primero la versión más reciente del IDE de Arduino y las bibliotecas.
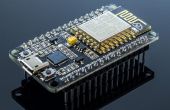
También supongo que instalaste todos los drivers necesarios para tu computadora para que reconozca la ESP8266, si no Adafruit tiene aquí un excelente tutorial. Adafruit ESP8266 Tutorial Esto es crucial si es tu primera vez usando el ESP8266
Después copie y pegue el siguiente código en el IDE de Arduino
Introduzca la latitud y longitud en el área de código "Home_LAT =" y "Home_LNG =" abajo
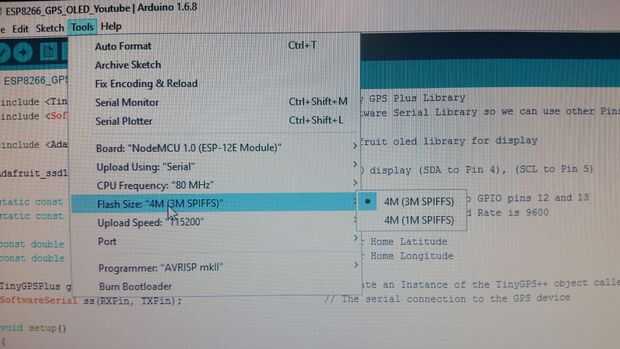
Compilarlo y subir a su esp-12e, en el IDE de Arduino no olvide seleccionar la tabla correcta (módulo ESP-12E en mi caso) y el tamaño de la memoria - 4M (3M SPIFF)
Ir de paseo o en coche y ver tu posición GPS actualización, recuerde que debe mantener sus ojos en el camino!
<p>#include <TinyGPS++.h> // Software Serial Library so we can use other Pins for communication with the GPS module</p><p>#include <SoftwareSerial.h > // Adafruit oled library for display</p><p>#include <Adafruit_ssd1306syp.h> // Adafruit oled library for display</p><p>Adafruit_ssd1306syp display(4,5); // OLED display (SDA to Pin 4), (SCL to Pin 5)</p><p>static const int RXPin = 12, TXPin = 13; // Ublox 6m GPS module to GPIO pins 12 and 13 static const uint32_t GPSBaud = 9600; // Ublox GPS default Baud Rate is 9600</p><p>const double Home_LAT = **.******; // enter Your Home Latitude const double Home_LNG = **.******; // enter Your Home Longitude</p><p>TinyGPSPlus gps; // Create an Instance of the TinyGPS++ object called gps SoftwareSerial ss(RXPin, TXPin); // The serial connection to the GPS device</p><p>void setup() { display.initialize(); // Initialize OLED display display.clear(); // Clear OLED display display.setTextSize(1); // Set OLED text size to small display.setTextColor(WHITE); // Set OLED color to White display.setCursor(0,0); // Set cursor to 0,0 display.println("GPS example"); display.println(TinyGPSPlus::libraryVersion()); display.update(); // Update display delay(1500); // Pause 1.5 seconds ss.begin(GPSBaud); // Set Software Serial Comm Speed to 9600 }</p><p>void loop() { display.clear(); display.setCursor(0,0); display.print("Latitude : "); display.println(gps.location.lat(), 5); // Sets the precision at which the location is displayed - currently 5 decimal places display.print("Longitude : "); display.println(gps.location.lng(), 4); display.print("Satellites: "); display.println(gps.satellites.value()); display.print("Elevation : "); display.print(gps.altitude.feet()); display.println("ft"); display.print("Time UTC : "); display.print(gps.time.hour()); // GPS time UTC display.print(":"); display.print(gps.time.minute()); // Minutes display.print(":"); display.println(gps.time.second()); // Seconds display.print("Heading : "); display.println(gps.course.deg()); display.print("Speed : "); display.println(gps.speed.mph()); unsigned long Distance_To_Home = (unsigned long)TinyGPSPlus::distanceBetween(gps.location.lat(),gps.location.lng(),Home_LAT, Home_LNG); display.print("KM to Home: "); // Have TinyGPS Calculate distance to home and display it display.print(Distance_To_Home); display.update(); // Update display delay(200); smartDelay(500); // Run Procedure smartDelay</p><p> if (millis() > 5000 && gps.charsProcessed() < 10) display.println(F("No GPS data received: check wiring")); }</p><p>static void smartDelay(unsigned long ms) // This custom version of delay() ensures that the gps object is being "fed". { unsigned long start = millis(); do { while (ss.available()) gps.encode(ss.read()); } while (millis() - start < ms); }</p>
