Paso 2: Vamos a ensuciar - el código de

Gracias a Adafruit podemos construir nuestro reloj inteligente muy rápido.
Btw. Si no está seguro si su i2C componentes son bien tratados, usar el escáner de i2C que encontrará aquí:
http://Playground.Arduino.CC/Main/I2cScanner
Implementé diferentes puntos de vista como un reloj (por supuesto ;)) movimiento, aceleración, roll & pitch un podómetro juego breakout (aquí que volveré más adelante)
Inicio simple
Así que empecemos, primero incluye un encabezado, usted los encontrará en la biblioteca de Arduino.
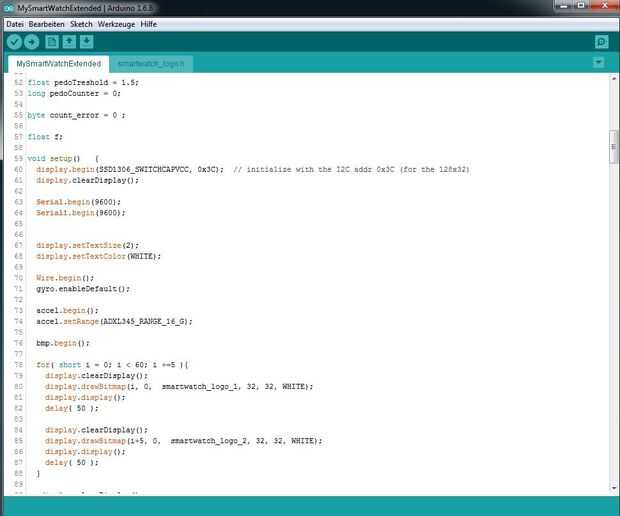
#include SPI.h#include Wire.h#include Adafruit_GFX.h #include Adafruit_SSD1306.h #include L3G4200D.h #include Adafruit_Sensor.h #include Adafruit_ADXL345_U.h #include Adafruit_BMP085.h
Definir el obj que utilizamos más adelante.
Adafruit_SSD1306 display(4);Adafruit_ADXL345_Unified accel = Adafruit_ADXL345_Unified(12345); Adafruit_BMP085 bmp; L3G4200D gyro;
Inicio todo lo que necesitamos
void setup() { display.begin(SSD1306_SWITCHCAPVCC, 0x3C); // adress display.clearDisplay(); // cls, clear screen Serial.begin(9600); // console output Serial1.begin(9600); // serial bluetooth output display.setTextSize(2); // define some display styles display.setTextColor(WHITE); Wire.begin(); gyro.enableDefault(); accel.begin(); accel.setRange(ADXL345_RANGE_16_G); } La parte difícil, contar tiempo
En nuestro bucle todo lo procesamos. Recibiendo mensajes de Serail1 (bluetooth) contar el tiempo, mostrar diferentes puntos de vista etc..
Debido a esto, no retrasar a un segundo y luego aumentar el tiempo. Tenemos que reaccionar muy rápido, si hay un mensaje pendiente en la cola de serail1 o de tiempo de la operación como cálculo del rodillo y la echada, Mostrar información o ejecutar el juego de breakout.
Esto lleva a un tiempo de retardo dinámico para reducir el error (cada cálculo costos tiempo de cpu)
void loop() { int mydelay = 100; // get current milli seconds long mimi_start = millis(); long v = 0; bt_settings(); // check bluetooth queue clockTick(); // update periodontally if( counter == 0){ // update these function every second switch( show_screen ){ case CLOCK : renderClock(); break; case TEMP : show_temp(); break; case ACCEL : show_accel(); break; case GYRO : show_gyro(); break; } } // this function will be updated more often if( show_screen == PEDO ){ show_pedo(); } // the game will also be more often be updated if( show_screen == GAME1 ){ play_game_1(); } v = millis() - mimi_start; // dynamical delay calculation // wait const. 100 micro seconds // millis() will be reset after 50 days ! so we will get a delay if( v < 0 ){ mydelay = 100; } else if( v > 100 ){ mydelay = 0; count_error += v - 100; while( count_error > 100 ){ count_error -= 100; counter++; } } else{ mydelay = 100-v; } delay(mydelay); counter++; } De hecho eso es todo.
La función bt_settings también puede costar mucho tiempo así que tenemos manejar. En mi caso hacer algunas operaciones de la cadena para establecer diferentes pantallas o ajustar la hora.
void bt_settings(){ if ( Serial1.available() ) { // if there is something in the queue, let's start long v1 = millis(); // we calculate our time error later long v2; BT_Text = Serial1.readString(); // some string operations v2 = (millis() - v1); while( v2 >= 100 ){ v2 -= 100; counter ++; // correct the time if necessary } } } Y por último el reloj
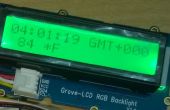
void renderClock(){ display.setTextSize(2); display.clearDisplay(); display.setCursor(12,10); display.print( formatValue(std_) + ":" + formatValue(min_) + ":"+ formatValue(sec_) ); display.display(); } Una función auxiliar
String formatValue( int v ){ String s = ""; if( v <10) s = "0"; s += String(v); return s; } ¿El final? -


