Usando Arduino, 2 cables, un pulsador y conducido y Arduino, encender y apagar un LED o cualquier cosa que decida encender y apagar.
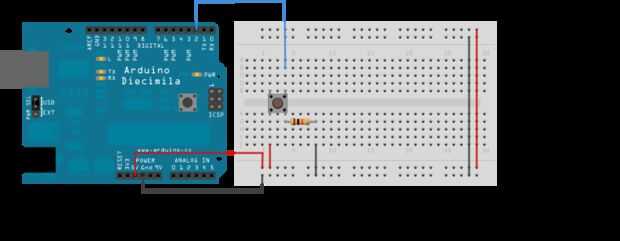
En lugar de utilizar el típico botón de esquema utilizando una resistencia pullup o jalones, como la imagen de Fritzing, aquí está una manera alrededor de eso, usando Arduino y declarando el botón pin como una entrada digital, pero escribir alta a ese pin de entrada digital.
En la función de configuración:
pinMode (buttonPin, entrada);
digitalWrite (buttonPin, HIGH);
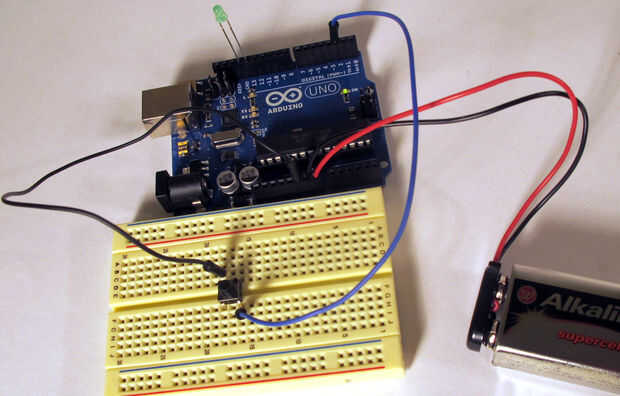
LED del pin 13 a tierra
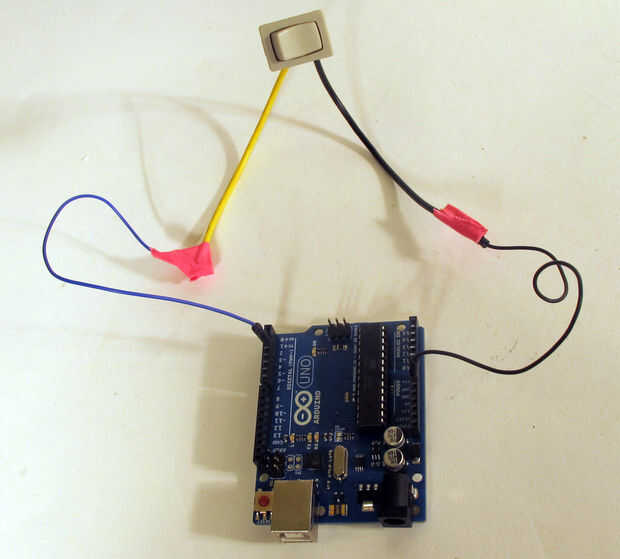
Alambre como el esquema en la foto:
Arduino pin 2 al pin de botón.
al otro lado del botón está conectado directamente a tierra.
Añadir el siguiente código:
//button wired pin 2 to ground directly // constants used here to set pin numbers: const int buttonPin = 2; // the number of the pushbutton pin const int ledPin = 13; // the number of the LED pin // variables will change: int buttonState = 0; // variable for reading the pushbutton status void setup() { //initialize the serial port Serial.begin(9600); // initialize the LED pin as an output: pinMode(ledPin, OUTPUT); // initialize the pushbutton pin as an input: pinMode(buttonPin, INPUT); //initialize the buttonPin as output digitalWrite(buttonPin, HIGH); } void loop(){ // read the state of the pushbutton value: buttonState = digitalRead(buttonPin); // check if the pushbutton is pressed. // if it is, the buttonState is HIGH: if (buttonState == HIGH) { // since we're writing HIGH to the pin when, if it's HIGH , the button isn't pressed, as in there is no connectivity between ground and pin 2: //so do whatever here that you want when the button is not pushed digitalWrite(ledPin, LOW); Serial.println("button not pushed "); } else { // turn LED on, or do whatever else you want when your button is pushed digitalWrite(ledPin, HIGH); Serial.println("button pushed"); } }

