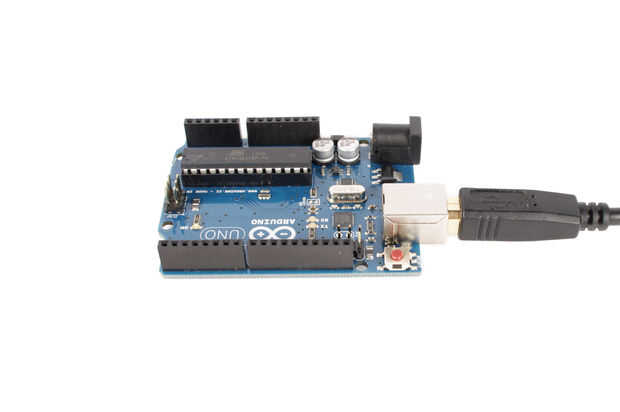
Paso 9: programa de
![]()
Programar el Arduino con el siguiente código:
/******************** (C) COPYRIGHT 2012 RadioSHack ******************** * Copyright© 2012 RadioShack Corporation (written by RadioShack Corporation) * Modified by Randy Sarafan 9/5/13 * * File Name : camsd.pde * Author : TRS * Version : V1.0 * Date : 28/05/2012 * Description : Main program body * ******************************************************************************** * THE PRESENT SOFTWARE WHICH IS FOR GUIDANCE ONLY AIMS AT PROVIDING CUSTOMERS * WITH CODING INFORMATION REGARDING THEIR PRODUCTS IN ORDER FOR THEM TO SAVE TIME. * AS A RESULT, RS SHALL NOT BE HELD LIABLE FOR ANY DIRECT, * INDIRECT OR CONSEQUENTIAL DAMAGES WITH RESPECT TO ANY CLAIMS ARISING FROM THE * CONTENT OF SUCH SOFTWARE AND/OR THE USE MADE BY CUSTOMERS OF THE CODING * INFORMATION CONTAINED HEREIN IN CONNECTION WITH THEIR PRODUCTS. *******************************************************************************/ #include <avr/pgmspace.h> #include "Arduino.h" //this library allows you to save the filenames into the Arduino's permanent memory //this is used for remembering what filename you used even after the Arduino is turned off and back on #include <EEPROM.h> /* * The following code includes all necessary routines to control Camera Shield * * In addition, we have prepared a example for making surveillance camera by putting Camera shield (RS SKU 2760248) and SD Card shield (RS SKU 2760243) together. * 1) Install SD Card shield properly and download all necessary FAT drivers from shield providers * 2) Install Camera shield properly * 3) Enable "#define sdCamera 1" to enable the demo code * 4) With the built-in motion detection function, camera shield will capture image and store to SD card automatically . * */ #define sdCamera 1 // ***** Enable the SD card related code #ifdef sdCamera #include <Sd2Card.h> // ***** SD card driver from http://www.seeedstudio.com/wiki/SD_Card_Shield or SD card shield supplier ***** #include <SdFat.h> // ***** FAT file system from http://www.seeedstudio.com/wiki/SD_Card_Shield or SD card shield supplier ***** #endif /* * SD chip select pin. Common values are: * * Arduino Ethernet shield, pin 4. * SparkFun SD shield, pin 8. * Adafruit SD shields and modules, pin 10. * Default SD chip select is the SPI SS pin. */ #ifdef sdCamera const uint8_t SdChipSelect = SS; SdFat sd; Sd2Card card; SdFile myFile; #endif #define NORMAL_USE 1 #define VC0706_PROTOCOL_SIGN 0x56 #define VC0706_SERIAL_NUMBER 0x00 #define VC0706_COMMAND_RESET 0x26 #define VC0706_COMMAND_GEN_VERSION 0x11 #define VC0706_COMMAND_TV_OUT_CTRL 0x44 #define VC0706_COMMAND_OSD_ADD_CHAR 0x45 #define VC0706_COMMAND_DOWNSIZE_SIZE 0x53 #define VC0706_COMMAND_READ_FBUF 0x32 #define FBUF_CURRENT_FRAME 0 #define FBUF_NEXT_FRAME 0 #define VC0706_COMMAND_FBUF_CTRL 0x36 #define VC0706_COMMAND_COMM_MOTION_CTRL 0x37 #define VC0706_COMMAND_COMM_MOTION_DETECTED 0x39 #define VC0706_COMMAND_POWER_SAVE_CTRL 0x3E #define VC0706_COMMAND_COLOR_CTRL 0x3C #define VC0706_COMMAND_MOTION_CTRL 0x42 #define VC0706_COMMAND_WRITE_DATA 0x31 #define VC0706_COMMAND_GET_FBUF_LEN 0x34 #define READ_DATA_BLOCK_NO 56 const int buttonPin = 7; // the number of the pushbutton pin int buttonState = LOW; // variable for reading the pushbutton status int buttonPressed = 0; //the named tagged on before the picture iteration number (i.e. "PIC243") String testpic = "PIC"; char stringToConvert[20]; // Or something long enough to hold the longest file name you will ever use. //variables for counting up the picture numbers int countup; int multiplyup; unsigned char tx_counter; unsigned char tx_vcbuffer[20]; bool tx_ready; bool rx_ready; unsigned char rx_counter; unsigned char VC0706_rx_buffer[80]; uint32_t frame_length=0; uint32_t vc_frame_address =0; uint32_t last_data_length=0; //const int ledPin = 4; // the number of the LED pin //------------------------------------------------------------------------------ void buffer_send(); // *********************************************************************************************************** // * // * Power Up Init. // * // * // *********************************************************************************************************** void setup() { pinMode(buttonPin, INPUT); // pinMode(ledPin, OUTPUT); //Set the initial EEPROM values //this needs to be commented out if you upload the code more than once EEPROM.write(1, 0); EEPROM.write(2, 0); //read the last values stored in the Arduino's memory countup = EEPROM.read(1); multiplyup = EEPROM.read(2); //If the count of countup goes over 255, increase multiplyup by 1 if(countup == 255){ EEPROM.write(1, 0); } //if multiplyup is 255, reset it to 0. //You would need to take about 65K pictures to get here if(multiplyup == 255){ EEPROM.write(2, 0); } // Initialize SdFat or print a detailed error message and halt // Use half speed like the native library. if (!sd.begin(SdChipSelect, SPI_HALF_SPEED)) sd.initErrorHalt(); delay(5); Serial.begin(115200); rx_ready=false; } // *********************************************************************************************************** // * // * Main Loop // * // * // *********************************************************************************************************** void loop(){ //determine if the camera button is pressed buttonState = digitalRead(buttonPin); //if the camera's button is pressed, set buttonpressed to true if(buttonState == HIGH){ buttonPressed = 1; } //if buttonpressed is true if(buttonPressed == 1){ //reset buttonpressed buttonPressed = 0; //run the capture photo routine capture_photo(); delay(100); VC0706_frame_control(3); // resume AV out delay(10); Serial.end(); // clear all rx buffer delay(5); Serial.begin(115200); rx_ready=false; } } /******************************************************************************* * Function Name : VC0706_reset * Description : Reset VC0706 * * Input : None * * Output : None * Return : None *******************************************************************************/ void VC0706_reset() { tx_vcbuffer[0]=VC0706_PROTOCOL_SIGN; tx_vcbuffer[1]=VC0706_SERIAL_NUMBER; tx_vcbuffer[2]=VC0706_COMMAND_RESET; tx_vcbuffer[3]=0x00; tx_counter=4; buffer_send(); } /******************************************************************************* * Function Name : VC0706_get_version * Description : Request version string from VC0706 * * Input : None * * Output : None * Return : None *******************************************************************************/ void VC0706_get_version() { tx_vcbuffer[0]=VC0706_PROTOCOL_SIGN; tx_vcbuffer[1]=VC0706_SERIAL_NUMBER; tx_vcbuffer[2]=VC0706_COMMAND_GEN_VERSION; tx_vcbuffer[3]=0x00; tx_counter=4; buffer_send(); } /******************************************************************************* * Function Name : VC0706_tv_out_control * Description : stop or start TV output from VC0706 * * Input : on=0 stop tv output ; : on=1 start tv output * * Output : None * Return : None *******************************************************************************/ void VC0706_tv_out_control(int on) { tx_vcbuffer[0]=VC0706_PROTOCOL_SIGN; tx_vcbuffer[1]=VC0706_SERIAL_NUMBER; tx_vcbuffer[2]=VC0706_COMMAND_TV_OUT_CTRL; tx_vcbuffer[3]=0x01; tx_vcbuffer[4]=on; tx_counter=5; buffer_send(); } /******************************************************************************* * Function Name : VC0706_osd_add_char * Description : ADD OSD CHARACTERS TO CHANNELS(CHANNEL 1) * * Input : col : Display column * ` row: Display Row * osd_string : display string (max 14 characters) * * Output : None * Return : None *******************************************************************************/ void VC0706_osd_add_char(int col, int row, String osd_string) { unsigned char col_row; int string_length; int i; col&=0x0f; row&=0x0f; col_row=(unsigned char)(col<<4 | row); string_length=osd_string.length(); if (string_length>14) string_length=14; // max 14 osd characters tx_vcbuffer[0]=VC0706_PROTOCOL_SIGN; tx_vcbuffer[1]=VC0706_SERIAL_NUMBER; tx_vcbuffer[2]=VC0706_COMMAND_OSD_ADD_CHAR; tx_vcbuffer[3]=string_length+2; tx_vcbuffer[4]=string_length; // character number tx_vcbuffer[5]=col_row; for (i=0;i<string_length;i++) { tx_vcbuffer[i+6]=osd_string.charAt(i); } tx_counter=string_length+6; buffer_send(); } /******************************************************************************* * Function Name : VC0706_w_h_downsize * Description : control width and height downsize attribute * * Input : scale_width = 0 1:1 * = 1 1:2 * = 2 1:4 * scale_height= 0 1:1 * = 1 1:2 * = 2 1:4 * * Output : None * Return : None *******************************************************************************/ void VC0706_w_h_downsize(int scale_width, int scale_height) { int scale; if (scale_width>=2) scale_width=2; if (scale_height>scale_width) scale_height=scale_width; scale=(unsigned char)(scale_height<<2 | scale_width); tx_vcbuffer[0]=VC0706_PROTOCOL_SIGN; tx_vcbuffer[1]=VC0706_SERIAL_NUMBER; tx_vcbuffer[2]=VC0706_COMMAND_DOWNSIZE_SIZE; tx_vcbuffer[3]=0x01; tx_vcbuffer[4]=scale; //bit[1:0] width zooming proportion //bit[3:2] height zooming proportion tx_counter=5; buffer_send(); } /******************************************************************************* * Function Name : VC0706_read_frame_buffer * Description : read image data from FBUF * * Input : buffer_address(4 bytes); buffer_length(4 bytes) * * Output : None * Return : None *******************************************************************************/ void VC0706_read_frame_buffer(unsigned long buffer_address, unsigned long buffer_length) { tx_vcbuffer[0]=VC0706_PROTOCOL_SIGN; tx_vcbuffer[1]=VC0706_SERIAL_NUMBER; tx_vcbuffer[2]=VC0706_COMMAND_READ_FBUF; tx_vcbuffer[3]=0x0c; tx_vcbuffer[4]=FBUF_CURRENT_FRAME; tx_vcbuffer[5]=0x0a; // 0x0a=data transfer by MCU mode; 0x0f=data transfer by SPI interface tx_vcbuffer[6]=buffer_address>>24; //starting address tx_vcbuffer[7]=buffer_address>>16; tx_vcbuffer[8]=buffer_address>>8; tx_vcbuffer[9]=buffer_address&0x0ff; tx_vcbuffer[10]=buffer_length>>24; // data length tx_vcbuffer[11]=buffer_length>>16; tx_vcbuffer[12]=buffer_length>>8; tx_vcbuffer[13]=buffer_length&0x0ff; tx_vcbuffer[14]=0x00; // delay time tx_vcbuffer[15]=0x0a; tx_counter=16; buffer_send(); } /******************************************************************************* * Function Name : VC0706_frame_control * Description : control frame buffer register * * Input : frame_control=control flag(1byte) * : 0 = stop current frame ; 1= stop next frame;2=step frame;3 =resume frame; * * Output : None * Return : None *******************************************************************************/ void VC0706_frame_control(byte frame_control) { if(frame_control>3)frame_control=3; tx_vcbuffer[0]=VC0706_PROTOCOL_SIGN; tx_vcbuffer[1]=VC0706_SERIAL_NUMBER; tx_vcbuffer[2]=VC0706_COMMAND_FBUF_CTRL; tx_vcbuffer[3]=0x01; tx_vcbuffer[4]=frame_control; tx_counter=5; buffer_send(); } /******************************************************************************* * Function Name : VC0706_motion_detection * Description : get motion monitoring status in communication interface. * * Input : control_flag = 0 stop motion monitoring * = 1 start motion monitoring * * Output : None * Return : None *******************************************************************************/ void VC0706_motion_detection(int control_flag) { if(control_flag>1)control_flag=1; tx_vcbuffer[0]=VC0706_PROTOCOL_SIGN; tx_vcbuffer[1]=VC0706_SERIAL_NUMBER; tx_vcbuffer[2]=VC0706_COMMAND_COMM_MOTION_CTRL; tx_vcbuffer[3]=0x01; tx_vcbuffer[4]=control_flag; tx_counter=5; buffer_send(); } /******************************************************************************* * Function Name : VC0706_motion_control * Description : motion control * * Input : control_flag = 0 forbid motion monitoring * = 1 enable motion monitoring * * Output : None * Return : None *******************************************************************************/ void VC0706_motion_control(int control_flag) { if(control_flag>1)control_flag=1; tx_vcbuffer[0]=VC0706_PROTOCOL_SIGN; tx_vcbuffer[1]=VC0706_SERIAL_NUMBER; tx_vcbuffer[2]=VC0706_COMMAND_MOTION_CTRL; tx_vcbuffer[3]=0x03; tx_vcbuffer[4]=0x00; //motion control attribute tx_vcbuffer[5]=0x01; //mcu uart control tx_vcbuffer[6]=control_flag; tx_counter=7; buffer_send(); } /******************************************************************************* * Function Name : VC0706_get_framebuffer_length * Description : get byte-lengths in FBUF * * Input : fbuf_type =current or next frame * 0 = current frame * 1 = next frame * * Output : None * Return : None *******************************************************************************/ void VC0706_get_framebuffer_length(byte fbuf_type) { if(fbuf_type>1)fbuf_type=1; tx_vcbuffer[0]=VC0706_PROTOCOL_SIGN; tx_vcbuffer[1]=VC0706_SERIAL_NUMBER; tx_vcbuffer[2]=VC0706_COMMAND_GET_FBUF_LEN; tx_vcbuffer[3]=0x01; tx_vcbuffer[4]=fbuf_type; tx_counter=5; buffer_send(); } /******************************************************************************* * Function Name : VC0706_uart_power_save * Description : stop current frame for reading * * Input : power_on =1 start power-save * = 0 stop power-save * * Output : None * Return : None *******************************************************************************/ void VC0706_uart_power_save(byte power_save_on) { tx_vcbuffer[0]=VC0706_PROTOCOL_SIGN; tx_vcbuffer[1]=VC0706_SERIAL_NUMBER; tx_vcbuffer[2]=VC0706_COMMAND_POWER_SAVE_CTRL; tx_vcbuffer[3]=0x03; tx_vcbuffer[4]=00; //power save control mode tx_vcbuffer[5]=01; // control by UART tx_vcbuffer[6]=power_save_on; //start power save tx_counter=7; buffer_send(); } /******************************************************************************* * Function Name : VC0706_uart_color_control * Description : stop current frame for reading * * Input : show_mode = 0 automatically step black-white and colour * 1 manually step color, select colour * 2 manually step color, select black-white * * Output : None * Return : None *******************************************************************************/ void VC0706_uart_color_control(byte show_mode) { if(show_mode>2) show_mode=2; tx_vcbuffer[0]=VC0706_PROTOCOL_SIGN; tx_vcbuffer[1]=VC0706_SERIAL_NUMBER; tx_vcbuffer[2]=VC0706_COMMAND_COLOR_CTRL; tx_vcbuffer[3]=0x02; tx_vcbuffer[4]=01; //control by UART tx_vcbuffer[5]=show_mode; // automatically step black-white and colour tx_counter=6; buffer_send(); } /******************************************************************************* * Function Name : VC0706_compression_ratio * Description : stop current frame for reading * * Input : ration >13(minimum) * <63(max) * * Output : None * Return : None *******************************************************************************/ void VC0706_compression_ratio(int ratio) { if(ratio>63)ratio=63; if(ratio<13)ratio=13; int vc_comp_ratio=(ratio-13)*4+53; tx_vcbuffer[0]=VC0706_PROTOCOL_SIGN; tx_vcbuffer[1]=VC0706_SERIAL_NUMBER; tx_vcbuffer[2]=VC0706_COMMAND_WRITE_DATA; tx_vcbuffer[3]=0x05; tx_vcbuffer[4]=01; //chip register tx_vcbuffer[5]=0x01; //data num ready to write tx_vcbuffer[6]=0x12; //register address tx_vcbuffer[7]=0x04; tx_vcbuffer[8]=vc_comp_ratio; //data tx_counter=9; buffer_send(); } /******************************************************************************* * Function Name : VC0706_motion_windows_setting * Description : motion windows setting * * Input : register_address(2 bytes); * data(4 bytes)= data ready to write * * Output : None * Return : None *******************************************************************************/ void VC0706_motion_windows_setting(unsigned int register_address, unsigned long data) { tx_vcbuffer[0]=VC0706_PROTOCOL_SIGN; tx_vcbuffer[1]=VC0706_SERIAL_NUMBER; tx_vcbuffer[2]=VC0706_COMMAND_WRITE_DATA; tx_vcbuffer[3]=0x08; tx_vcbuffer[4]=01; //chip register tx_vcbuffer[5]=0x04; //data num ready to write tx_vcbuffer[6]=register_address>>8; //register address tx_vcbuffer[7]=register_address&0x0ff;; tx_vcbuffer[8]=data>>24; // data ready to write tx_vcbuffer[9]=data>>16; tx_vcbuffer[10]=data>>8; tx_vcbuffer[11]=data&0x0ff; tx_counter=12; buffer_send(); } /******************************************************************************* * Function Name : debug_send * Description : Transmit buffer to Arduino Serial Monitor * * Input : tx_vcbuffer * * Output : None * Return : None *******************************************************************************/ void debug_send() { int i=0; for (i=0;i<tx_counter;i++) { Serial.print(tx_vcbuffer[i], HEX); Serial.print(", "); } Serial.println(""); } /******************************************************************************* * Function Name : buffer_send * Description : Transmit buffer to VC0706 * * Input : tx_vcbuffer * * Output : None * Return : None *******************************************************************************/ void buffer_send() { int i=0; for (i=0;i<tx_counter;i++) Serial.write(tx_vcbuffer[i]); tx_ready=true; } /******************************************************************************* * Function Name : buffer_read * Description : Receive buffer from VC0706 * * Input : None * * Output : rx_buffer, rx_ready * Return : None *******************************************************************************/ void buffer_read() { bool validity=true; if (rx_ready) // if something unread in buffer, just quit return; rx_counter=0; VC0706_rx_buffer[0]=0; while (Serial.available() > 0) { VC0706_rx_buffer[rx_counter++]= Serial.read(); //delay(1); } if (VC0706_rx_buffer[0]!=0x76) validity=false; if (VC0706_rx_buffer[1]!=VC0706_SERIAL_NUMBER) validity=false; if (validity) rx_ready=true; } #ifdef sdCamera /******************************************************************************* * Function Name : capture_photo * Description : capture a photo and store the file named temp.jpg into SD * * Input : None * * Output : None * Return : None *******************************************************************************/ void capture_photo(){ // Check to see if the file exists: // if exists,delete the file: //if(sd.exists("temp.jpg")) sd.remove("temp.jpg"); nameCountUp(); // open a new empty file for write at end like the Native SD library boolean f = myFile.open(stringToConvert, O_RDWR | O_CREAT | O_AT_END); if (!f) { sd.errorHalt("opening temp.jpg for write failed"); } // close the file: myFile.close(); //63 is the highest this can go VC0706_compression_ratio(63); delay(100); VC0706_frame_control(3); delay(10); VC0706_frame_control(0); delay(10); rx_ready=false; rx_counter=0; Serial.end(); // clear all rx buffer delay(5); Serial.begin(115200); //get frame buffer length VC0706_get_framebuffer_length(0); delay(10); buffer_read(); //while(1){}; // store frame buffer length for coming reading frame_length=(VC0706_rx_buffer[5]<<8)+VC0706_rx_buffer[6]; frame_length=frame_length<<16; frame_length=frame_length+(0x0ff00&(VC0706_rx_buffer[7]<<8))+VC0706_rx_buffer[8]; vc_frame_address =READ_DATA_BLOCK_NO; myFile.open(stringToConvert, O_RDWR); while(vc_frame_address<frame_length){ VC0706_read_frame_buffer(vc_frame_address-READ_DATA_BLOCK_NO, READ_DATA_BLOCK_NO); delay(9); //get the data with length=READ_DATA_BLOCK_NObytes rx_ready=false; rx_counter=0; buffer_read(); // write data to temp.jpg myFile.write(VC0706_rx_buffer+5,READ_DATA_BLOCK_NO); //read next READ_DATA_BLOCK_NO bytes from frame buffer vc_frame_address=vc_frame_address+READ_DATA_BLOCK_NO; } // get the last data vc_frame_address=vc_frame_address-READ_DATA_BLOCK_NO; last_data_length=frame_length-vc_frame_address; VC0706_read_frame_buffer(vc_frame_address,last_data_length); delay(9); //get the data rx_ready=false; rx_counter=0; buffer_read(); myFile.write(VC0706_rx_buffer+5,last_data_length); myFile.close(); resetName(); } #endif //Determines the name of the next picture void nameCountUp(){ countup = EEPROM.read(1); multiplyup = EEPROM.read(2); countup = countup + 1; EEPROM.write(1, countup); testpic.concat(countup + (multiplyup * 255)); testpic = testpic + ".jpg"; testpic.toCharArray(stringToConvert, sizeof(stringToConvert)); } void resetName(){ if(countup == 255){ countup = 0; EEPROM.write(1, countup); multiplyup = multiplyup + 1; EEPROM.write(2, multiplyup); } delay(10); testpic = "PIC"; }
