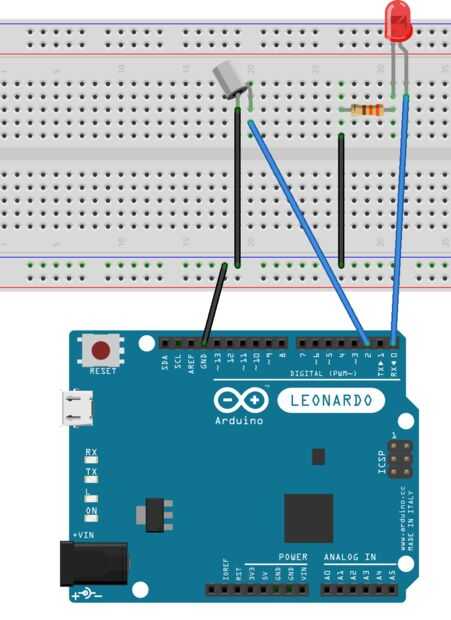
Paso 2: Creación de prototipos y control de la

Usando el AtTiny 85 es una gran opción para aquellos que están familiarizados con Arduino, porque tienes la posibilidad de utilizar el IDE de Arduino para programarlo. Esto significa que usted puede prototipo del circuito con Arduino antes de desplegar a lo AtTiny.
Así que escribí este código, y construí un simple circuito prueba con Arduino.
<p>#import <Arduino.h><br></p><p>int led = 0; // LEDs pin int button = 2; // Tilt sensor pin int brightness = 0; // how bright the LED is int fadeAmount = 5; // how many points to fade the LED by int storedVal = 0; // used to save the tilt sensor state</p><p>void setup() { pinMode(button, INPUT_PULLUP); // initialize the button pin a pullup input, so I don't have to use an external pullup resistor. pinMode(led, OUTPUT); // initialize the digital pin as an output. }</p><p>void loop() {</p><p> int sensorVal = digitalRead(2); // Read the sensor state</p><p> if (sensorVal != storedVal) { //if the sensor value has changed, blink the eyes storedVal = sensorVal; // store the sensor state fadeEyes(); // call the eyes led fade function } else { digitalWrite(led, LOW); // otherwise, turn the led off }</p><p> delay(10); // a small delay for debouncing the sensor }</p><p>void fadeEyes() {</p><p> for (int i = 0; i < 768; i++) { //cycle 3 times analogWrite(led, brightness); // set the brightness of led pin: if (brightness == 255) { // at maximum brightness, wait 5 seconds delay(5000); } // change the brightness for next time through the loop: brightness = brightness + fadeAmount;</p><p> // reverse the direction of the fading at the ends of the fade: if (brightness == 0 || brightness == 255) { fadeAmount = -fadeAmount; }</p><p> // wait for 30 milliseconds to see the dimming effect delay(100);</p><p> }</p><p> digitalWrite(led, LOW); }</p> El código es bastante simple: espera un changement en el estado del sensor de inclinación, y cuando esto ocurre, comienza un bucle pequeño desvanecimiento el brillo de los leds
Cuando el código funcione sobre Arduino, usted está listo para desplegar en su AtTiny85


