Paso 7: bono! Control remoto
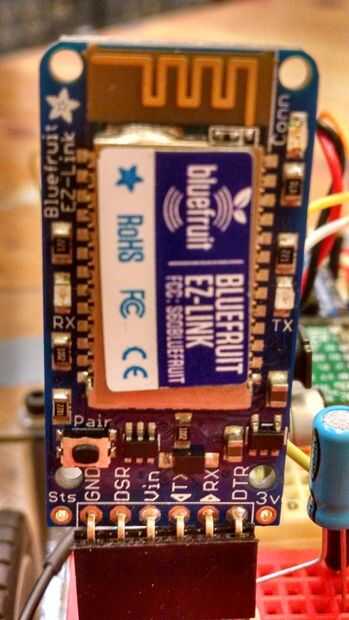
Si desea la opción de controlar manualmente robot, todo lo que necesitas es este adaptador bluetooth de Adafruit.
http://www.Adafruit.com/products/1588
Si conecta el GND a tierra, el Vin a + 5 voltios y TX pin 0 en el arduino y el RX al pin 1 en el arduino, puede enlazar el ordenador a tu arduino. Actúa como una conexión en serie, y se puede utilizar para subir scripts o enviar datos.
Escribimos un script mediante procesamiento (https://processing.org/download/) que transmite las pulsaciones de teclado al arduino y le permite moverse el robot usa las teclas WASD.
// Click on the image to give it focus, // and then press any key. import processing.serial.*; int value = 0; String word = " "; String mode = " "; boolean auto = false; Serial myPort; void setup() { size(300, 90); // size always goes first! String portName = Serial.list() [0]; myPort = new Serial(this, portName, 115200); } void draw() { background(0); myPort.write(key); if (auto) { mode = " AUTO "; word = " "; } else { mode = "MANUAL"; } fill(255); textSize(40); textAlign(CENTER); text(mode, width/2, 40); textAlign(CENTER); text(word, width/2, 80); } void keyPressed() { if (key == ' ') { auto = !auto; } if (!auto) { if (key == 'w') { word = "FORWARD"; } else if (key == 'd') { word = " RIGHT "; } else if (key == 'a') { word = " LEFT "; } else if (key == 's') { word = "REVERSE"; } else {key = 'p';} } } void keyReleased() { key = 'p'; }
