Paso 3: Conectar las luces del LED
En este paso, sólo pueden seguir las fotos:
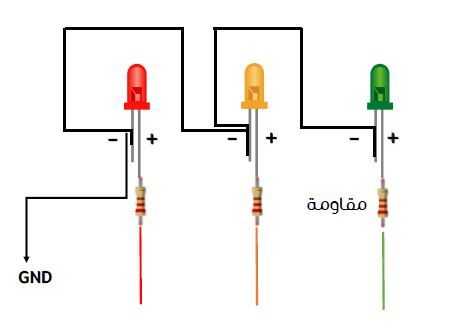
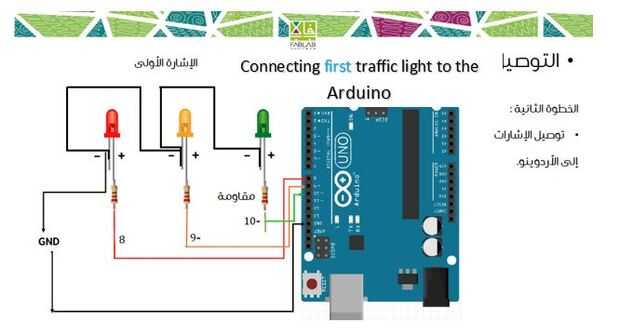
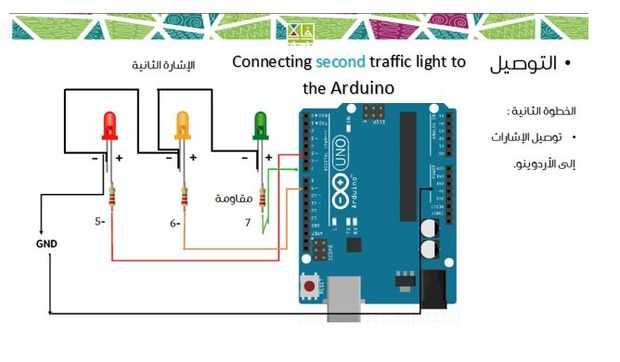
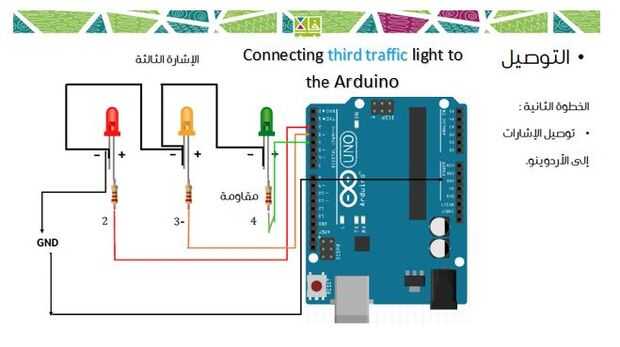
En cada semáforo, le Solde un resistor para el lado positivo. Entonces
se conectará todo el lado negativo junto al puerto de GND de Arduino.
----------------------------------------------------------
بعد الانتهاء من تصميم مجسم المشروع, سوف ننتقل إلى تركيب اجزاءه
الرئيسية (اشارات المرور).
سوف نقوم بتركيبها كما هو موضح افضل الصور التالية:


")

