Paso 3: Arduino Bluetooth
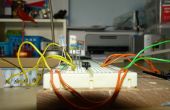
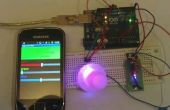
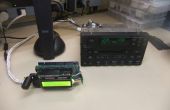
Carga el código siguiente en el Arduino con el fin de establecer su Arduino como el esclavo de bluetooth: /* Bluetooth Setup on Arduino by Nicole Grimwood Based upon: Seeed Wiki Bluetooth slave code http://www.seeedstudio.com/wiki/index.php?title=Bluetooth_Shield This code is in the public domain. */ #include <SoftwareSerial.h> // Software Serial Port #define RxD 6 // This is the pin that the Bluetooth (BT_TX) will transmit to the Arduino (RxD) #define TxD 7 // This is the pin that the Bluetooth (BT_RX) will receive from the Arduino (TxD) #define DEBUG_ENABLED 1 SoftwareSerial blueToothSerial(RxD,TxD); #define DATA_1 (PORTC |= 0X01) // DATA 1 #define DATA_0 (PORTC &= 0XFE) // DATA 0 #define STRIP_PINOUT (DDRC=0xFF) void setup() { pinMode(RxD, INPUT); // Setup the Arduino to receive INPUT from the bluetooth shield on Digital Pin 6 pinMode(TxD, OUTPUT); // Setup the Arduino to send data (OUTPUT) to the bluetooth shield on Digital Pin 7 setupBlueToothConnection(); // Used to initialize the Bluetooth shield } void loop() { char recvChar; while(1){ if(blueToothSerial.available()){ // check if there's any data sent from the remote bluetooth recvChar = blueToothSerial.read(); Serial.print(recvChar); // Print the character received to the Serial Monitor } } } // The following code is necessary to setup the bluetooth shield void setupBlueToothConnection(){ blueToothSerial.begin(38400); //Set BluetoothBee BaudRate to default baud rate 38400 blueToothSerial.print("\r\n+STWMOD=0\r\n"); //set the bluetooth work in slave mode blueToothSerial.print("\r\n+STNA=SeeedBTSlave\r\n"); //set the bluetooth name as "SeeedBTSlave" blueToothSerial.print("\r\n+STOAUT=1\r\n"); // Permit Paired device to connect me blueToothSerial.print("\r\n+STAUTO=0\r\n"); // Auto-connection should be forbidden here delay(2000); // This delay is required. blueToothSerial.print("\r\n+INQ=1\r\n"); //make the slave bluetooth inquirable Serial.println("The slave bluetooth is inquirable!"); delay(2000); // This delay is required. blueToothSerial.flush(); } Si el bluetooth funciona correctamente, un rojo y un LED verde destellará uno tras otro en secuencia en la pantalla. Si esto no funciona pasa unos segundos después de cargar el código en el Arduino, poder try ciclismo el Arduino y el código de recarga.
